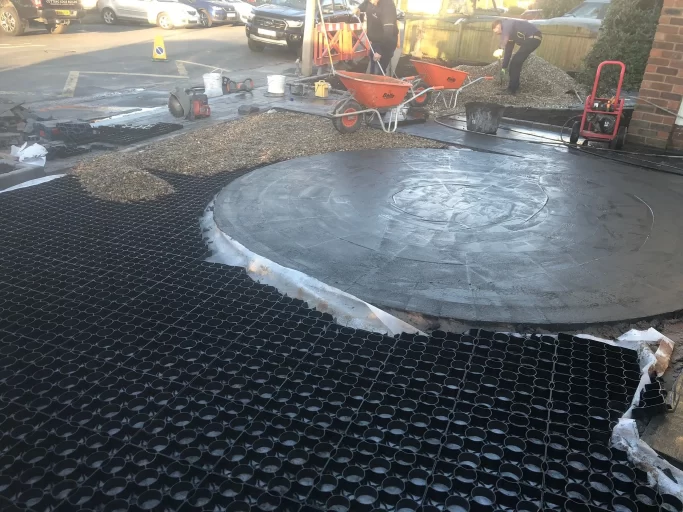
To install core gravel grids, which are a system designed for stabilizing gravel surfaces, follow these steps:
- Site Preparation:
- Clear the area of debris, rocks, and vegetation.
- Grade the area to ensure proper drainage.
- Base Material:
- Spread a base material like crushed stone or aggregate evenly over the prepared area. The depth may vary depending on the specific requirements of the core gravel system.
- Compaction:
- Compact the base material using a plate compactor to create a stable foundation.
- Install Geotextile Fabric:
- The core grids come with a Geotextile membrane already installed to the base of the grids, so there’s no need to install any at this stage.
- Lay Core Gravel Grids:
- Place the core gravel grids on top of the geotextile fabric. Ensure they interlock securely.
- Fill with Gravel:
- Fill the grids with the chosen gravel or decorative stone. Use a shovel or a mechanical spreader for an even distribution.
- Compact Again:
- Compact the gravel-filled grids using a plate compactor. This helps to lock the gravel in place and create a solid surface.
- Check Level:
- Ensure that the surface is level and adjust as needed.
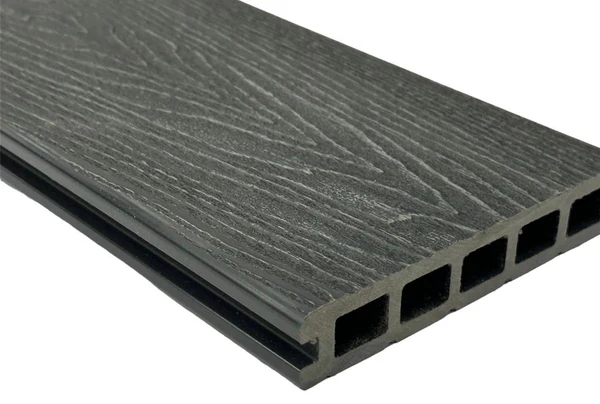
- Edge Restraints:
- Install edge restraints, like plastic or metal strips, along the perimeter to keep the gravel and grids in place.
- Watering:
- Water the area to settle the gravel and enhance stability.
Core gravel grids provide a stable and permeable surface, suitable for driveways, walkways, and other areas with gravel. Always follow the manufacturer’s guidelines for specific installation instructions related to the core gravel system you are using
How to install core gravel grids